

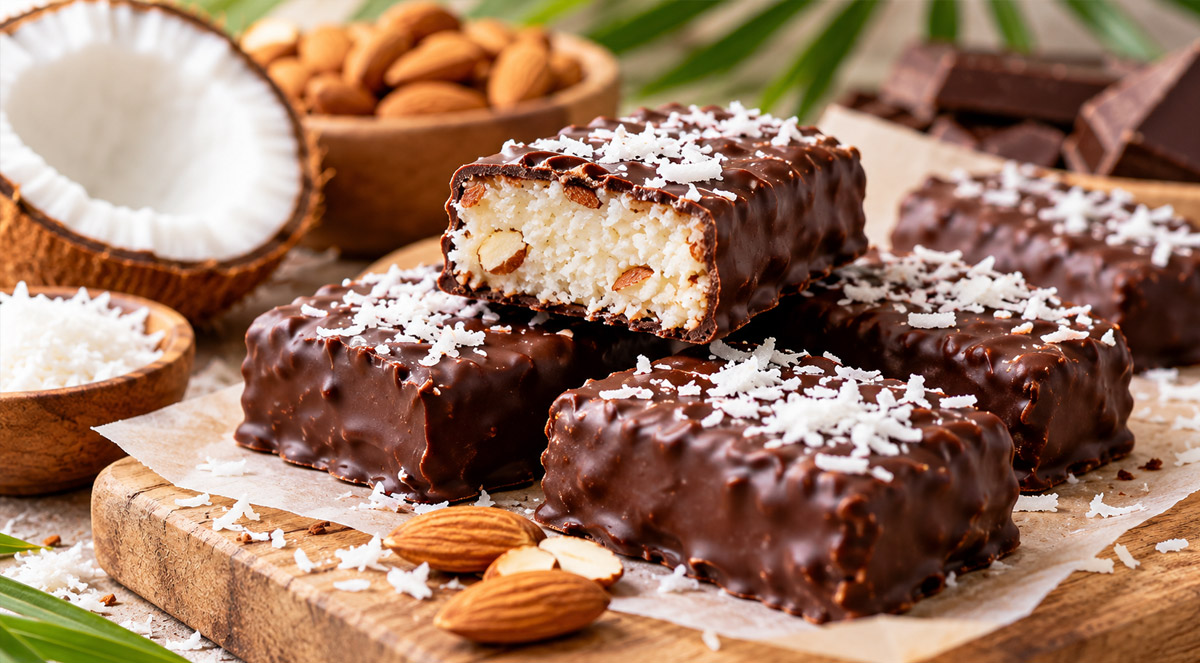
If you love the combination of rich dark chocolate and creamy coconut, these homemade Coconut Secret Bars are a treat worth making! They feature a soft, rich coconut filling, an irresistible chocolate coating, and optional roasted almonds for an extra crunch. Best of all, they’re easy to prepare in a food processor and require no baking.
Made with unsweetened shredded coconut, coconut oil, and a touch of natural sweetener, these no-bake coconut bars are perfect for satisfying your sweet tooth. Prepare a batch ahead of time and keep them chilled whenever you want a little homemade treat.
Recipe Details
Prep Time: 20 minutes
Cook Time: 0 minutes
Chilling Time: 30–60 minutes, approximately
Servings: 16 bars
Difficulty: Easy
Ingredients
For the Coconut Filling
- 4 cups grated or shredded unsweetened coconut
- ½ cup softened or melted coconut oil
- 2–4 tablespoons coconut nectar or honey, adjusted to taste
- Roasted whole or slivered almonds (optional)
For the Chocolate Coating
- ½ cup dark chocolate pieces
- 1 tablespoon coconut oil
Instructions
1. Prepare the coconut mixture.
Add the unsweetened coconut, coconut oil, and 2 tablespoons of coconut nectar or honey to a food processor. Process for several minutes until the mixture becomes moist and starts to hold together. Depending on your food processor and the texture of your coconut, this may take a little longer.
2. Adjust the sweetness.
Taste the coconut mixture and add more sweetener if desired. Process again briefly to distribute it evenly throughout the filling.
3. Shape the coconut filling.
Line an 8 × 8-inch baking pan with parchment paper. Transfer the coconut mixture into the pan and press it down firmly into an even layer. If you’re using roasted almonds, distribute them over the mixture and gently press them into the filling.
4. Chill until firm.

Place the pan in the refrigerator or freezer until the coconut layer is firm enough to cut. The freezer will speed up the process, while refrigeration allows the mixture to set more gradually.
5. Melt the chocolate.
While the filling chills, combine the dark chocolate pieces and 1 tablespoon of coconut oil in a heatproof bowl. Melt them in short intervals in the microwave, stirring between each interval, or use a double boiler. Stir until the chocolate is smooth and glossy.
6. Cut the bars.
Once the coconut filling is firm, lift it out of the pan using the parchment paper. Place it on a cutting board and cut it into 16 bars or smaller bite-sized squares.
7. Coat with chocolate.
Dip each coconut bar into the melted chocolate, turning it to coat as much of the surface as desired. Let the excess chocolate drip off before placing the bars on a parchment-lined tray.
8. Allow the chocolate to set.
Return the bars to the refrigerator until the chocolate coating is firm. Once set, transfer them to an airtight container and store them chilled for the best texture.
Tips for the Best Coconut Secret Bars
Choose unsweetened coconut. Unsweetened shredded coconut gives you better control over the sweetness and lets the rich coconut flavor shine through.
Adjust the texture if needed. If the filling seems too dry to hold together, process it a little longer. If it remains crumbly, add a small amount of melted coconut oil and process again.
Experiment with the almonds. Whole roasted almonds provide a satisfying crunch, while slivered almonds create a more delicate texture. You can also leave them out for a classic chocolate-and-coconut combination.
Use good-quality dark chocolate. Chocolate with a rich cocoa flavor balances the sweetness of the coconut filling beautifully. Choose your preferred cocoa percentage based on how intense you like your chocolate.
Keep the bars chilled. Coconut oil softens at warm temperatures, so refrigeration helps the bars maintain their shape and keeps the chocolate coating firm.
How to Store Homemade Coconut Secret Bars
Store your Coconut Secret Bars in an airtight container in the refrigerator. They should keep well for about one week, although the exact shelf life depends on the freshness of the ingredients and how they’re handled.
For longer storage, freeze the bars in a freezer-safe container, separating the layers with parchment paper. Allow them to soften slightly in the refrigerator before serving.
Frequently Asked Questions
Can I make Coconut Secret Bars without a food processor?
Yes! A food processor makes it easier to combine the ingredients and release some of the natural oils from the coconut. Without one, use finely shredded coconut and mix thoroughly with the softened coconut oil and sweetener. The texture may be a little less compact.
Can I use maple syrup instead of honey?
Yes. Maple syrup can be used as an alternative, although it may make the filling slightly softer. Add it gradually and adjust the amount according to your taste and the consistency of the mixture.
Are Coconut Secret Bars suitable for a vegan diet?
They can be. Use maple syrup or another plant-based sweetener instead of honey, and choose dark chocolate that contains no dairy ingredients.
Do these bars need to be refrigerated?
Yes, refrigeration is recommended because the coconut oil softens at room temperature. Keeping the bars chilled helps them hold their shape and preserves the texture of the chocolate coating.
Final Thoughts
These homemade Coconut Secret Bars are a simple way to enjoy the delicious combination of coconut and dark chocolate without turning on the oven. With just a handful of ingredients, minimal preparation, and plenty of room for customization, they’re a lovely addition to your collection of easy homemade treats.
Whether you add crunchy roasted almonds or keep the filling smooth and simple, these chocolate-covered coconut bars are perfect for preparing ahead and sharing with family and friends. Keep a batch in the refrigerator, and you’ll always have a delicious little treat ready when a chocolate craving strikes!